一、创建标签并给Google voice信息邮件附以对应标签
(一)登入Gmail创建过滤器并分配标签
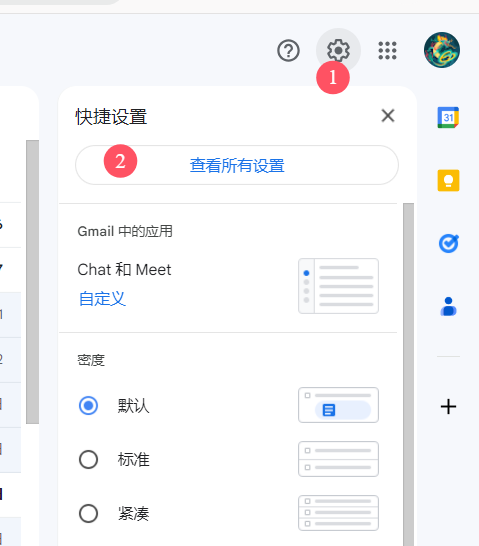
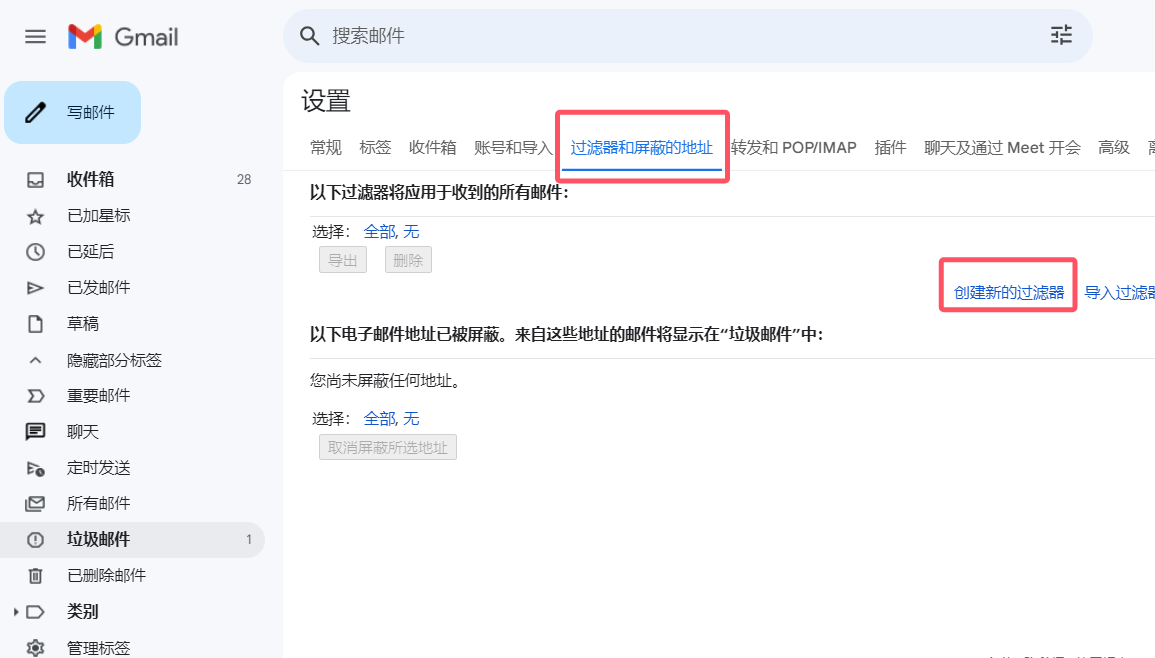
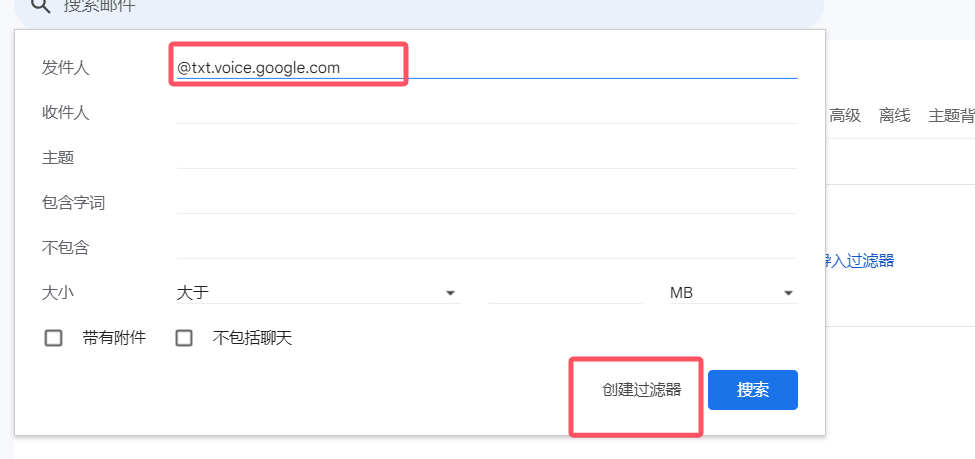
1.登入 Gmail,在设置里选择 ”查看所有设置” –> ““过滤器和屏蔽的地址” –> “创建新的过滤器” –> 在发件人处填写 “@txt.voice.google.com”。如下图所示:
①
②
③
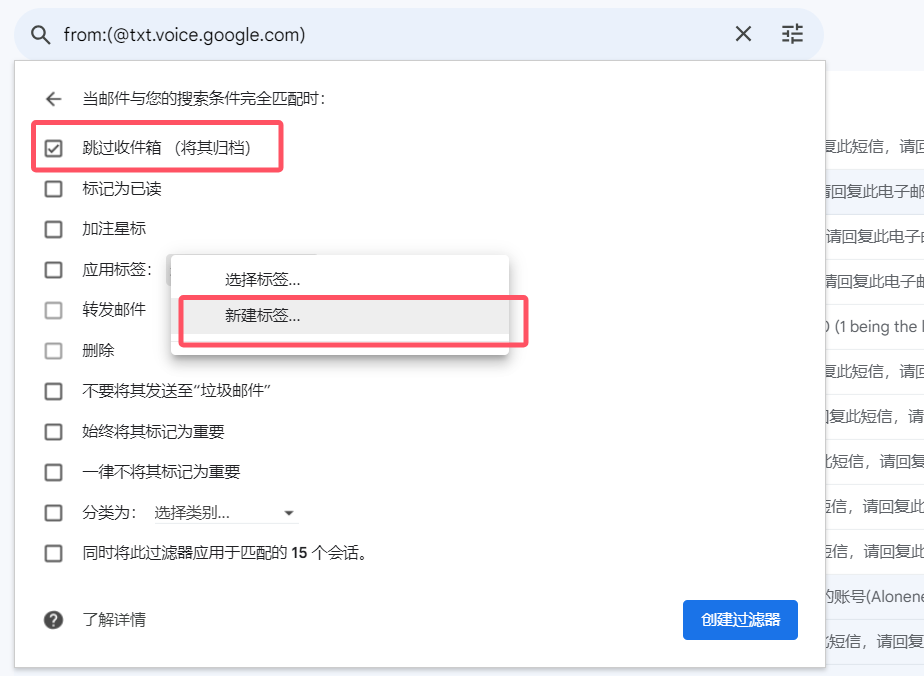
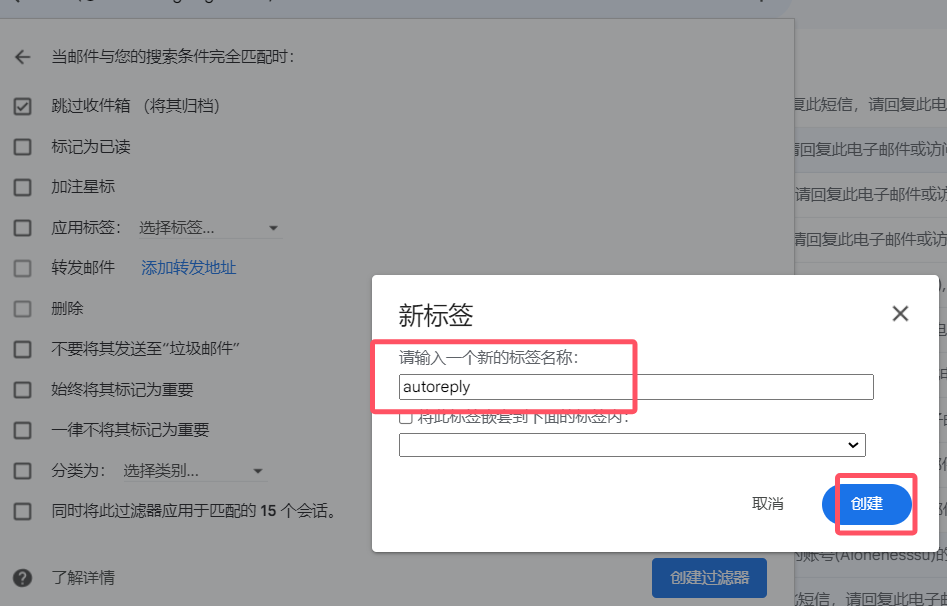
2.给过滤器里的Google voice信息邮件加上标签"autoreply",最后点创建-创建过滤器:
①
②
二、创建自动Script脚本
(一)登入Google drive
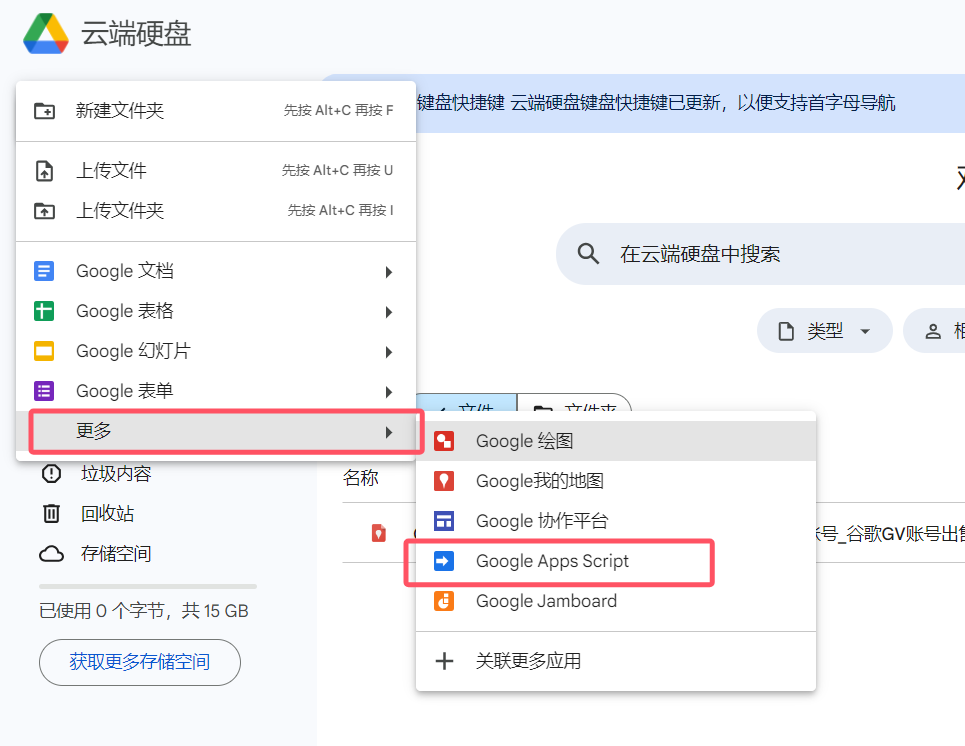
登入Google drive(https://drive.google.com),Google drive个人首页里左上角“新建”——“更多”——“Google app script”
(二)创建脚本并调试
点击后出现“警告提示框”选“创建脚本”即可;将下方代码全部复制进去即可:
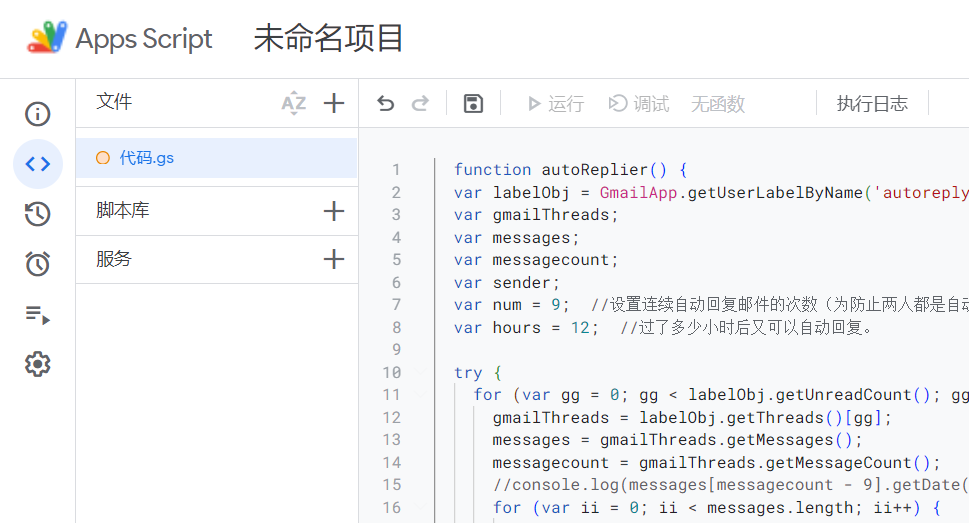
Script代码👇
  function autoReplier() {
  var labelObj = GmailApp.getUserLabelByName('autoreply');
  var gmailThreads;
  var messages;
  var messagecount;
  var sender;
  var num = 4;  //设置连续自动回复邮件的次数(为防止两人都是自动回复,当发送次数达到 9 时将不自动回复)。
  var hours = 24;  //过了多少小时后又可以自动回复。

  try {
    for (var gg = 0; gg < labelObj.getUnreadCount(); gg++) {
      gmailThreads = labelObj.getThreads()[gg];
      messages = gmailThreads.getMessages();
      messagecount = gmailThreads.getMessageCount();
      //console.log(messages[messagecount - 9].getDate() + "  time");
      for (var ii = 0; ii < messages.length; ii++) {

        if (messages[ii].isUnread()) {

          msg = messages[ii].getPlainBody();
          sender = messages[ii].getFrom();

          array = [["Red berries grow in southern land,In spring they overload the trees.————Automatic Reply(needgv.com)"],["十年生死两茫茫,不思量,自难忘。————Automatic Reply(needgv.com)"],["此情可待成追忆,只是当时已惘然。————Automatic Reply(needgv.com)"],["Gather them till full is your hand:They would revive fond memories.————Automatic Reply(needgv.com)"],["千里莺啼绿映红,水村山郭酒旗风。南朝四百八十寺,多少楼台烟雨中。————Automatic Reply(needgv.com)"],["In spring green waves grow as blue as sapphire.————Automatic Reply(needgv.com)"],["春眠不觉晓,处处闻啼鸟。————Automatic Reply(needgv.com)"],["夜来风雨声,花落知多少。————Automatic Reply(needgv.com)"],["We held their hands;We are to grow old together with them.————Automatic Reply(needgv.com)"]];
          var j = Math.floor(Math.random() * (array.length));
          var temp = array[j];

          if (messagecount < num){
            MailApp.sendEmail(sender, "Auto Reply", temp);
          }else if( (messages[messagecount - 1].getDate().getTime() - messages[messagecount - num].getDate().getTime()) > hours * 60 * 60 * 1000 ){
            MailApp.sendEmail(sender, "Auto Reply", "我们已经很热情了,让我们冷静一下……");
          }
          messages[ii].markRead();
          messages[ii].moveToTrash();
        }
      }
    }
  } catch (err) {
      console.error('for loop error: ' + e);
  }
}
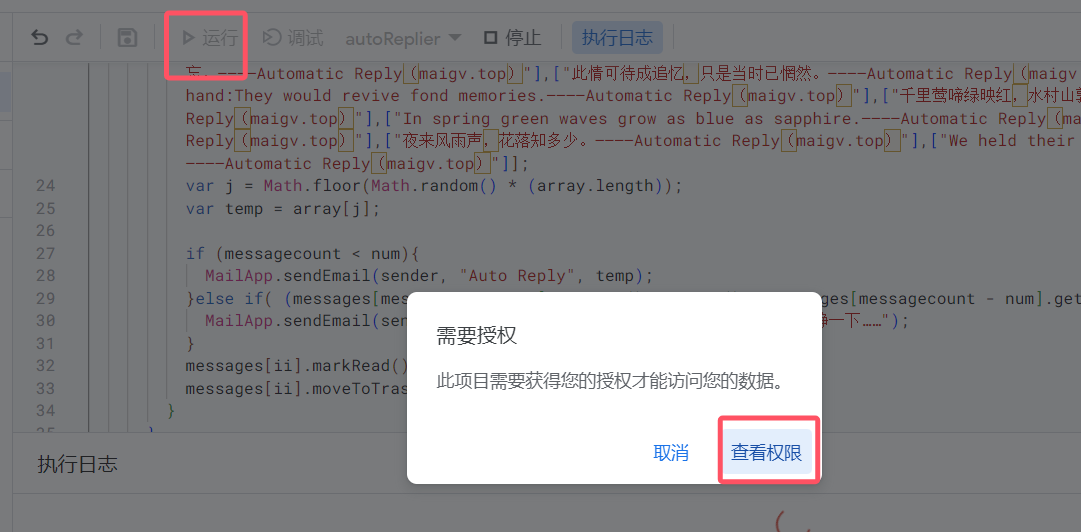
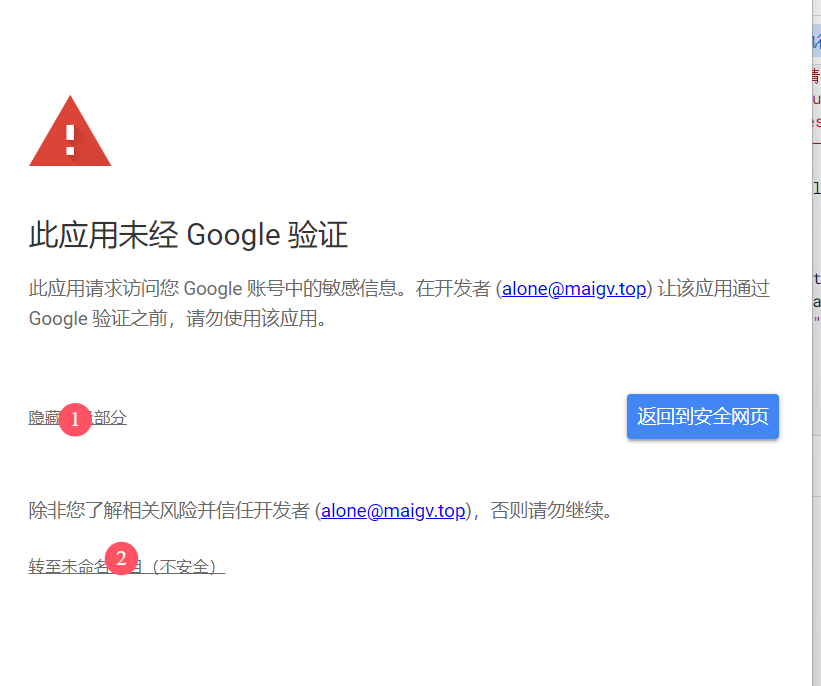
确认无误复制粘贴全部进去后点击保存—运行—在弹出来的对话框中选择查看权限—高级—转至未命名项目—在提示界面选择授权即可:
①

②
③
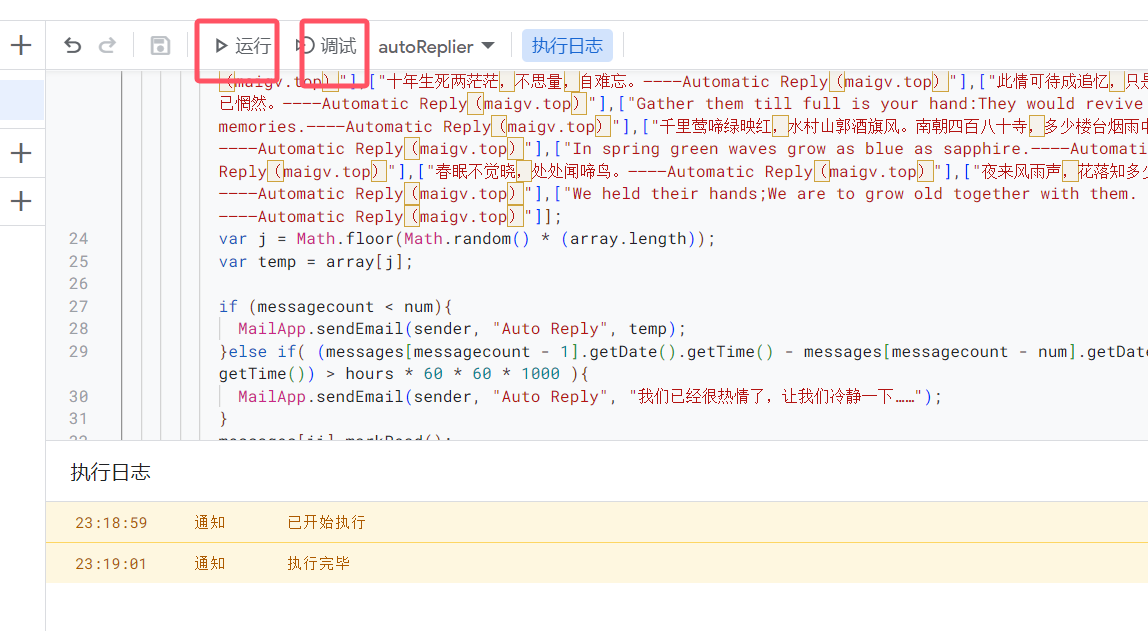
尝试运行和调试都正常,如下图所示:
(三)创建触发器
按照如下步骤创建触发器,需要选择时间驱动、分钟定时器、每分钟:
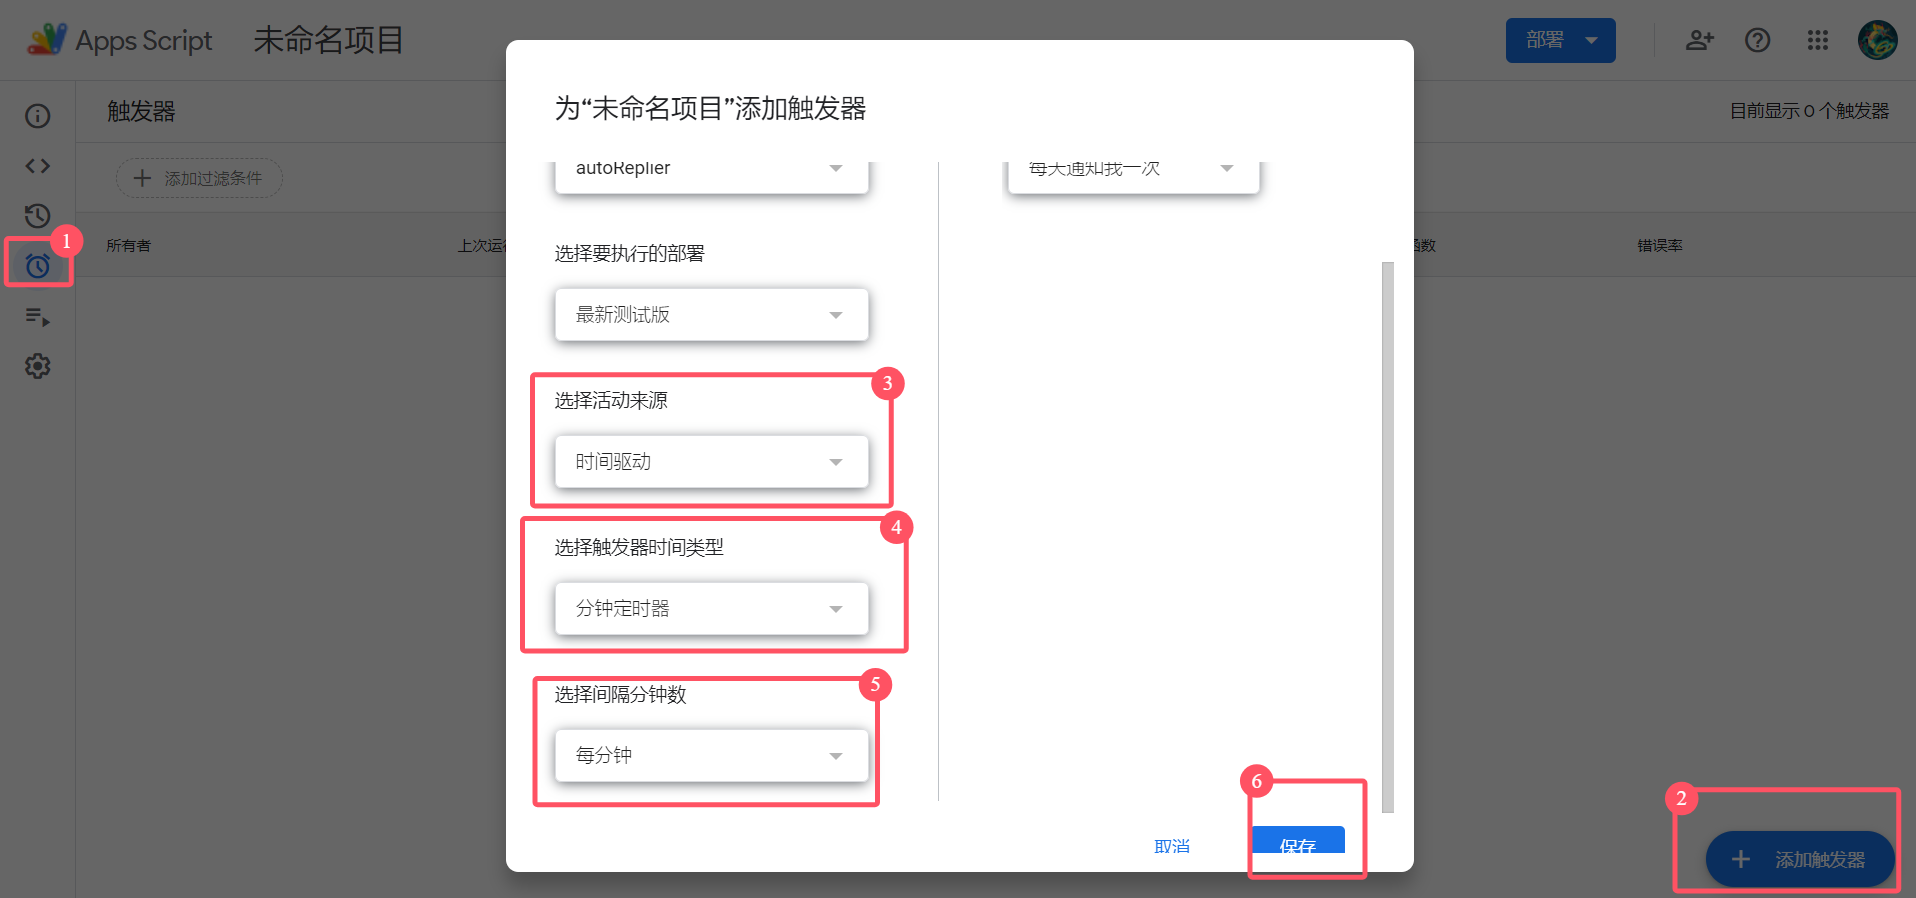
最后如果弹出的有“被拦截的窗口”,打开它,按照上方授权一样的步骤同意即可!
至此自动保号脚本部署完毕,可以找个美国号码或者用美国号码发送验证的网站测试下(PS:有些手机号是几个数字,这种不会触发脚本)。


